How To Prep for Patio Pavers
A beautifully laid patio enhances any outdoor space, providing a functional area for relaxation and entertainment. However, the longevity and stability of a paver patio rely heavily on proper preparation. A well-prepared base prevents settling, cracking, and weed growth, ensuring the patio remains a source of pride for years to come.
This guide outlines the essential steps for preparing a base for patio pavers, offering a comprehensive approach to ensure a successful project.
Planning and Marking the Area
Careful planning is the cornerstone of any successful patio project. Begin by defining the desired patio shape and size using stakes and string. Consider the intended use of the space, furniture placement, and traffic flow when determining dimensions. Accurate measurements are crucial for calculating material quantities and ensuring a level surface.
Once the area is marked, contact local utility companies to identify underground lines. Striking a buried line can cause significant damage and disrupt service. After marking the area, account for the excavation depth and add a border extending beyond the string line for easier access during installation.
Excavation and Base Material
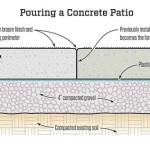
Excavating the area to the correct depth is critical for proper drainage and stability. The depth depends on the thickness of the pavers and the base material. A general rule is to excavate deep enough to accommodate the paver thickness, a layer of bedding sand (typically 1 inch), and the base material (usually 4 to 6 inches compacted). Always factor in the slope for drainage, typically a quarter-inch drop per foot away from structures.
The excavated soil should be removed and properly disposed of. Consider renting a dumpster or arranging for soil removal services. After excavation, compact the exposed soil using a hand tamper or plate compactor. This creates a stable foundation for the base material.
The choice of base material impacts the patio's long-term performance. Crushed gravel, a mixture of various-sized stones, is a common choice due to its excellent drainage and compaction properties. Alternatively, crushed limestone offers similar benefits and can be a more cost-effective option in certain regions. Spread the chosen base material evenly across the excavated area and compact it in layers using a plate compactor. Ensure each layer is no more than 2 inches thick before compaction to achieve optimal density and prevent future settling.
Edge Restraints and Bedding Sand
Edge restraints, also known as paver edging, play a crucial role in maintaining the patio's shape and preventing pavers from shifting. These restraints are typically made of plastic, metal, or concrete and are installed around the perimeter of the excavated area. Secure them firmly in place using stakes or spikes. A properly installed edge restraint system provides a solid boundary against which the pavers can rest, ensuring a clean and stable edge.
Once the edge restraints are in place, add a layer of bedding sand. This layer provides a smooth, level surface for the pavers and allows for minor adjustments during installation. Screed the bedding sand using two pipes or straight boards as guides to achieve a uniform depth. Avoid walking on the leveled bedding sand to maintain its integrity.
Final Checks and Paver Installation
Before laying the pavers, perform a final check to ensure the prepared base meets the necessary requirements. Verify the slope for adequate drainage and confirm the compacted base material is level and even. Address any irregularities before proceeding to the paver installation phase. A meticulous final check helps avoid costly corrections later and ensures a smooth, even patio surface.
After verifying the base, begin laying the pavers according to the chosen pattern. Start from a corner or straight edge and work inward. Leave consistent gaps between the pavers for joint sand, typically 1/8 inch to 1/4 inch. Use a rubber mallet to gently tap the pavers into the bedding sand, ensuring they are level and flush with each other. Cut pavers as needed to fit around curves or obstacles using a paver splitter or wet saw.
Post-Installation Procedures
After laying all the pavers, spread joint sand over the surface and sweep it into the gaps using a push broom. Vibrating the pavers with a plate compactor helps settle the joint sand and further stabilize the patio. Repeat the sweeping and vibrating process until the joints are completely filled. Once the joints are filled, thoroughly water the patio to help the joint sand settle and harden. This final step locks the pavers in place and completes the installation process, resulting in a stable and durable patio surface.

How To Prep Lay A Base For Pavers Western Interlock

Paver Installation Landscaping Network
.jpg?strip=all)
How To Install Patio Pavers Lv

Urban Landworks Blog

Concrete Pavers By Ideal

How To Install Pavers Installing A Patio Step By Guide

Paver Patios That Will Save You Time And Effort Family Handyman

Installing Patio Stones 5 Easy Steps Shaw Brick

Diy Booster Learn How To Lay Pavers Like A Pros

Paver Patios Blocks Make A Strong Foundation For Your Outdoor Spaces


