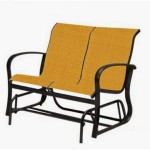
How to Make Patio Cushions
Creating custom patio cushions can be a rewarding DIY project, allowing you to personalize your outdoor space and achieve the perfect look and feel. This guide provides a comprehensive overview of the process, from selecting materials to sewing the finished product. This article will offer step-by-step instructions on how to make patio cushions, emphasizing the importance of choosing high-quality materials for both durability and comfort.
Choosing Materials
The quality of materials used will directly affect the lifespan and comfort of your patio cushions. Consider the following factors when selecting materials:
Fabric: Outdoor fabrics are designed to resist fading, mildew, and water damage. Popular choices include Sunbrella, acrylic, and polyester blends. Choose a fabric with a tight weave to prevent dirt and debris from penetrating the fibers.
Fill: High-density foam is ideal for outdoor cushions, providing excellent support and comfort. Avoid using low-density foam, as it can easily compress and lose its shape over time. Consider adding a layer of batting or polyester fiberfill for added softness and comfort.
Sewing Supplies: You will need heavy-duty sewing thread, a sewing machine with a strong needle, and fabric scissors.
Crafting the Cushions
Once you have gathered your materials, you can begin creating your patio cushions. The process can be broken down into the following steps:
1. Measure and Cut Fabric: Measure the dimensions of your patio furniture and add seam allowances to determine the fabric size. Cut the fabric according to your measurements.
2. Prepare the Foam: Cut the foam to the desired size and shape, ensuring it fits snugly within the fabric envelope. For extra comfort, consider adding layers of batting or fiberfill on top of the foam.
3. Assemble the Cushion: Pin the fabric pieces together, right sides facing each other. Sew the pieces together using a strong stitch, leaving an opening for inserting the foam.
4. Insert the Foam: Carefully insert the foam into the cushion through the opening. Once inserted, close the opening by sewing or zipping it shut.
Finishing Touches
After completing the basic construction, you can add finishing touches to enhance the look and functionality of your patio cushions. This may include:
1. Adding Ties or Straps: Sew ties or straps to the corners of the cushions to help secure them to the furniture. This will prevent them from blowing away in windy conditions.
2. Adding Zippered Covers: Consider creating zippered covers for your cushions, allowing for easier cleaning and replacement.
3. Personalizing with Embroidery or Appliqués: Add a personal touch by embroidering your initials or adding decorative appliques to the cushions.
Creating custom patio cushions can be an enjoyable and rewarding experience, enhancing your outdoor space with personalized design and comfort. By following these steps and utilizing high-quality materials, you can create long-lasting and beautiful cushions that will enhance your enjoyment of your patio for years to come.

Make Your Own Outdoor Cushions A Beautiful Mess

Easy Way To Make Outdoor Cushion Covers

Cheap Diy Outdoor Cushions A Butterfly House

Diy Outdoor Seat Cushions Curly Crafty Mom

Make Your Own Outdoor Cushions A Beautiful Mess

Sew Easy Outdoor Cushion Covers Confessions Of A Serial Do It Yourselfer

Make Your Own Reversible Patio Chair Cushions It Love

Diy Outdoor Cushion In Less Than An Hour How To Make Cushions For Patio Furniture

A Full Diy On How Easy It Is To Re Cover Patio Cushions For Outdoor Living

How To Make Cushion Covers For Outdoor Furniture The Ruffled Purse