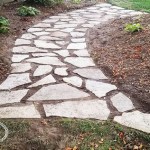
Do It Yourself Patio Pavers
Tired of your old, drab concrete patio? Want to add a touch of style to your outdoor space without breaking the bank? Then it's time to learn how to lay patio pavers yourself. With a little bit of planning and effort, you can create a beautiful and durable patio that will last for years to come.
### Step 1: Plan Your PatioBefore you start digging, it's important to plan out your patio. Decide on the size and shape you want, and make sure to measure the area carefully. You'll also need to choose the type of pavers you want to use. There are many different types of pavers available, so take your time and compare prices and styles before making a decision.
### Step 2: Prepare the GroundOnce you have your plan, it's time to prepare the ground. Start by removing any existing vegetation or debris. Then, excavate the area to a depth of about 6 inches. Compact the soil, and then add a layer of gravel or crushed stone. This base layer will help to distribute weight and prevent the pavers from sinking. Finish by leveling and smoothing the base layer.
### Step 3: Lay the PaversNow it's time to start laying the pavers. Start by placing the pavers around the edges of the patio. Once you have the edge pavers in place, you can start filling in the center. Work in small sections, and use a rubber mallet to tap the pavers into place. Be sure to leave a small gap between each paver. This gap will allow for water drainage and expansion.
### Step 4: Fill the JointsOnce all the pavers are in place, it's time to fill the joints. There are several different materials you can use to fill the joints, including sand, polymeric sand, and mortar. Sand is the least expensive option, but it can be washed away by rain. Polymeric sand is a more durable option, and it helps to lock the pavers in place. Mortar is the most expensive option, but it creates a permanent bond between the pavers.
### Step 5: Seal the PatioOnce the joints are filled, it's time to seal the patio. Sealing the patio will help to protect it from the elements and prevent weeds from growing between the pavers. There are several different types of sealers available, so be sure to read the labels carefully before making a decision. Apply the sealer according to the manufacturer's instructions.
### Step 6: Enjoy Your New PatioYour new patio is now complete! You can enjoy your new outdoor space for years to come. With proper care and maintenance, your patio will stay looking beautiful for years to come.

How To Build A Patio An Easy Do It Yourself Project

Diy Pea Gravel Patio With Pavers Love Renovations

How To Build A Paver Patio Rogue Engineer

Budget Friendly Diy Paver Block Patio Interior Frugalista

How To Build A Backyard Paver Patio All By Yourself Youtube

How To Build A Diy Patio For Under 120 Outdoor Spaces

Diy Paver Patio And Firepit Life On Shady Lane

How To Build A Paver Patio Young House Love

How To Build A Paver Patio Rogue Engineer

Take The Fun Outside With A Paver Patio Seattle Times


