DIY Patio Screen Enclosure Kits: A Comprehensive Guide
Patio screen enclosures offer a valuable extension to living spaces, providing a protected outdoor area for relaxation, dining, and entertainment. These enclosures shield individuals from insects, debris, and excessive sunlight, allowing for comfortable enjoyment of the outdoors. Opting for a do-it-yourself (DIY) patio screen enclosure kit presents a cost-effective and customizable solution for homeowners. This article provides a comprehensive overview of DIY patio screen enclosure kits, encompassing their benefits, components, installation considerations, and selection criteria.
A DIY patio screen enclosure kit typically comprises all the necessary materials and instructions for constructing a screened-in area. The kit may include framing materials (aluminum, vinyl, or wood), screening fabric, hardware (screws, connectors, anchors), and door components. The primary advantage of a DIY kit is the potential for significant cost savings compared to hiring a professional contractor. Furthermore, homeowners can tailor the enclosure's dimensions and features to meet their specific needs and aesthetic preferences. The installation process, while potentially time-consuming, offers a sense of accomplishment and the opportunity to acquire valuable home improvement skills. The initial investment in tools and time is offset by the long-term enjoyment of a protected outdoor space.
Key Considerations Before Purchasing a DIY Patio Screen Enclosure Kit
Prior to purchasing a DIY patio screen enclosure kit, careful consideration should be given to several key factors. This planning phase is crucial for ensuring a successful project outcome and avoiding costly mistakes. The following points outline essential aspects to evaluate.
1. Structural Requirements and Permitting: The first step involves assessing the existing patio structure. A structurally sound patio is paramount to ensure the stability and safety of the enclosure. Existing concrete slabs must be level and free from significant cracks or damage. If the patio lacks a solid foundation, construction of a suitable base may be necessary. Furthermore, local building codes and regulations must be consulted to determine whether a permit is required for the enclosure project. Failure to obtain the necessary permits can result in fines or the forced removal of the structure. Researching and adhering to local building codes is a critical pre-installation step.
2. Measurements and Design: Accurate measurements are crucial for selecting the appropriate size kit and ensuring a proper fit. Carefully measure the length, width, and height of the intended enclosure area. Consider the desired door placement and the overall aesthetic of the enclosure in relation to the existing house design. Some kits offer customizable options, allowing modifications to the dimensions or features. Sketching a detailed design plan can help visualize the final product and identify potential challenges. This planning should include door placement and any considerations for maintaining access to utilities or outdoor features around the patio.
3. Material Selection: The choice of materials for the framing and screening fabric significantly impacts the enclosure's durability, appearance, and maintenance requirements. Aluminum frames are lightweight, rust-resistant, and require minimal maintenance. Vinyl frames are also durable and weather-resistant, but can be less rigid than aluminum. Wood frames offer a more traditional aesthetic, but require regular painting or staining to prevent deterioration. The selection of screening fabric depends on the level of insect protection desired, visibility, and resistance to tearing. Fiberglass screening is a common and affordable option, while aluminum screening offers greater durability. Consider factors such as pet resistance and UV protection when choosing the screening fabric.
Understanding the Components of a DIY Patio Screen Enclosure Kit
A thorough understanding of the components included in a DIY patio screen enclosure kit is essential for a successful installation. Familiarizing oneself with the various parts and their functions during the planning phase will streamline the assembly process.
1. Framing Materials: The framing materials form the structural skeleton of the enclosure. Aluminum, vinyl, and wood are the most common options. Aluminum frames are typically powder-coated for enhanced durability and aesthetics. Vinyl frames are available in various colors and textures. Wood frames offer design flexibility but require painting or staining. The kit should include all necessary framing pieces, cut to size or requiring minimal cutting. Corner connectors and hardware for assembling the frame are also included.
2. Screening Fabric: The screening fabric is the barrier that keeps insects and debris out of the enclosure. Fiberglass screening is a popular choice due to its affordability and ease of installation. Aluminum screening offers greater durability and pet resistance. Other options include polyester screening and no-see-um screening, which provides finer mesh for protection against smaller insects. The kit should include sufficient screening fabric to cover all the frame openings, with extra material for trimming and securing. The method of securing the screen (spline, staples, or clips) will also be specified in the kit.
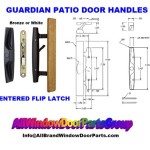
3. Door Components: The door provides access to and from the enclosure. The kit may include a pre-assembled screen door or components for building a custom door. Hinges, handles, latches, and weather stripping are essential door components. The door frame should be constructed from the same material as the main enclosure frame for a cohesive look. The door should swing smoothly and latch securely to keep insects out. Consider the placement and orientation of the door for accessibility and convenience.
4. Hardware and Fasteners: The hardware and fasteners are the essential elements that hold the enclosure together. Screws, bolts, nuts, washers, and anchors are used to connect the framing members and secure the enclosure to the patio surface. The kit should include high-quality, corrosion-resistant hardware to ensure the long-term stability of the structure. Check the kit's specifications to confirm that the included hardware is suitable for the chosen framing material and patio surface. Anchors for securing the frame to concrete or wood are especially crucial for resisting wind loads.
Installation Process and Key Considerations
The installation process for a DIY patio screen enclosure kit can vary depending on the kit design, materials used, and the homeowner's skill level. While the specific steps may differ, certain key considerations apply to all installations.
1. Preparation and Tool Acquisition: Before commencing the installation, gather all the necessary tools and equipment. Common tools include a measuring tape, level, drill, screwdriver, saw (if cutting is required), hammer, and safety glasses. A power drill with various bits is essential for assembling the frame and securing it to the patio surface. A level ensures that the frame is plumb and square. A saw may be needed to trim framing members or screening fabric to size. Safety glasses protect the eyes from debris during cutting and drilling. Having all the tools readily available will streamline the installation process and minimize delays.
2. Frame Assembly and Attachment: The first step in the installation process is typically assembling the frame according to the manufacturer's instructions. This may involve connecting framing members using corner connectors and screws. Ensure that the frame is square and level before proceeding. Once the frame is assembled, it needs to be securely attached to the patio surface. This may involve drilling pilot holes and using concrete anchors or wood screws, depending on the patio material. The frame should be securely anchored to prevent movement during windstorms. Check that the frame is plumb and level before permanently securing it. Uneven surfaces may require shimming to ensure a level installation.
3. Screening Installation and Tensioning: After the frame is securely attached, the screening fabric is installed. This may involve stretching the fabric over the frame and securing it with spline, staples, or clips. Proper tensioning of the screen is crucial for preventing sagging and ensuring a tight, insect-proof seal. Special tools, such as a spline roller, may be required for certain screening methods. Start by attaching the screen to one corner and then gradually working around the frame, ensuring even tension. Trim any excess screening fabric after it is securely attached. Monitor tension in the screen material to prevent wrinkles or sags. The specific method of attaching screen will vary based on the type of kit purchased. Some kits may utilize snap-in screens that are simple to install. Others use a roller tool to press the screen into place. Regardless of the method, tension and security are imperative.
4. Door Installation and Adjustments: The final step is to install the door and make any necessary adjustments. The door frame should be aligned with the main enclosure frame and securely attached. Hinges should be properly installed to allow the door to swing smoothly. The latch should engage securely to keep insects out. Weather stripping should be applied around the door frame to create a tight seal. Minor adjustments may be required to ensure that the door opens and closes properly. The door should be level and swing freely without rubbing against the frame. Add or remove shims where necessary to fine-tune alignment. Test the door operation several times to ensure optimal functionality.
Successful installation of a DIY patio screen enclosure kit requires meticulous planning, careful execution, and attention to detail. Following the manufacturer's instructions, utilizing the appropriate tools, and taking the time to ensure a proper fit will result in a durable and enjoyable outdoor space. While the task may appear daunting, the long-term benefits of a screened-in patio make the effort worthwhile.

Polaria Patio Rooms Diy Screened Enclosures

Easyroom Sunroom Diy Kit By Patio Enclosures

Easyroom Sunroom Diy Kit By Patio Enclosures

Balnea Screen Enclosures Diy Square Patio Room

Do It Yourself Diy Screened In Porch The Original Screen Tight System

Easyroom Sunroom Diy Kit By Patio Enclosures

Diy Aluminum Patio Covers Screened Enclosures Modular Sunrooms Porch Screening Kits Home Inc

Diy Aluminum Screened Wall Systems

Create A Three Season Room With Diy Screened In Porch

Easyroom Sunroom Diy Kit By Patio Enclosures

