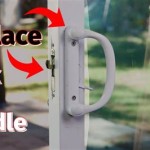
Andersen Patio Door Weatherstrip Replacement
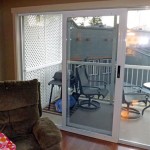
Andersen patio doors are known for their durability and energy efficiency, but even the best doors can start to show signs of wear and tear over time. One common problem is that the weatherstripping can become damaged or worn out, which can lead to drafts and air leaks. If you're experiencing this problem, you may be considering replacing the weatherstripping on your Andersen patio door.
Replacing the weatherstripping on an Andersen patio door is a relatively simple task that can be completed in a few hours. However, it is important to choose the right weatherstripping and to follow the manufacturer's instructions carefully. In this article, we will provide you with a step-by-step guide on how to replace the weatherstripping on your Andersen patio door.
Materials You Will Need
- New weatherstripping
- Phillips head screwdriver
- Utility knife
- Measuring tape
Step-by-Step Instructions
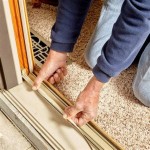
- Remove the old weatherstripping. Start by removing the old weatherstripping from the door frame. Use a Phillips head screwdriver to remove the screws that hold the weatherstripping in place. Once the screws are removed, you can carefully pry the weatherstripping off the door frame.
- Clean the door frame. Once the old weatherstripping is removed, clean the door frame thoroughly. Remove any dirt, dust, or debris that may have accumulated on the frame. This will help to ensure that the new weatherstripping will adhere properly.
- Measure and cut the new weatherstripping. Measure the length of the door frame and cut the new weatherstripping to the appropriate length. Use a utility knife to cut the weatherstripping.
- Apply the new weatherstripping. Apply the new weatherstripping to the door frame. Start by pressing the weatherstripping into place at the top of the door frame. Then, work your way down the sides and bottom of the door frame, pressing the weatherstripping into place as you go.
- Secure the new weatherstripping. Once the new weatherstripping is in place, secure it with screws. Use a Phillips head screwdriver to drive the screws through the weatherstripping and into the door frame. Space the screws evenly along the length of the weatherstripping.
- Test the new weatherstripping. Once the new weatherstripping is installed, test it to make sure it is working properly. Close the door and check for any drafts or air leaks. If you feel any air coming in around the door, you may need to adjust the weatherstripping or add more weatherstripping to the door frame.
Tips for Replacing Weatherstripping
- When choosing new weatherstripping, be sure to select a product that is compatible with your Andersen patio door.
- Follow the manufacturer's instructions carefully when installing the new weatherstripping.
- Be sure to clean the door frame thoroughly before applying the new weatherstripping.
- Apply the new weatherstripping carefully and evenly to ensure a good seal.
- Secure the new weatherstripping with screws to ensure that it stays in place.
- Test the new weatherstripping to make sure it is working properly.
By following these tips, you can easily replace the weatherstripping on your Andersen patio door and improve the energy efficiency of your home.

200 Series Perma Shield Gliding Patio Door Interlock Weatherstrip Set Andersen

200 Series Perma Shield Gliding Patio Door Interlock Weatherstrip Set Andersen

Andersen 200 Series Perma Shield Gliding Patio Door Weatherstrip

Replacing An Interlock Weatherstrip On Gliding Patio Doors Frenchwood And Narroline Andersen

Andersen Patio Door Astragal Weatherstrip
Andersen Hinged Door Weatherstrip

Replacing The Weatherstrip On Frenchwood Gliding Patio Doors Andersen Windows

Terratone Interlock Weatherstrip 9130503 Andersen Doors 100 Series Gliding Patio Door

Andersen Perma Shield Ps611 Gliding Door Lh Operating Lock Stile Weatherstrip

Andersen Gliding Door Weatherstrip