```html
Floating Deck Over Concrete Patio: A Comprehensive Guide
A floating deck over a concrete patio offers an attractive and practical solution for enhancing outdoor living spaces. It allows homeowners to improve the aesthetics of an existing concrete surface, add comfort underfoot, and create a more defined and inviting area for relaxation and entertainment. Unlike traditional decks, a floating deck is not directly attached to the house or the existing concrete slab, simplifying construction and minimizing potential structural issues.
This article will explore the concept of floating decks over concrete patios in detail, examining various aspects including design considerations, material selection, construction techniques, and maintenance procedures. Understanding these factors is crucial for achieving a successful and long-lasting deck that seamlessly integrates with the surrounding environment.
Understanding the Advantages of a Floating Deck
Choosing a floating deck over a traditional, attached deck comes with several distinct advantages. These benefits can significantly impact the overall project cost, ease of construction, and long-term maintenance requirements.
Firstly, the simplified construction process is a major draw. Because a floating deck is not structurally connected to the house, permits are often easier to obtain, and the construction process itself requires less specialized knowledge and fewer tools. This can translate to significant cost savings, particularly for homeowners undertaking the project as a DIY endeavor. There is no need to dig footings, attach ledger boards to the house, or worry about complex structural considerations relating to the home's foundation.
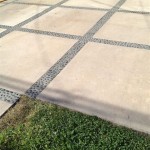
Secondly, floating decks provide a more forgiving solution for uneven concrete surfaces. Minor imperfections in the existing patio can be easily accommodated using adjustable deck supports or shims. This eliminates the need for extensive and costly concrete repairs before deck construction can begin. The deck surface itself will remain level and aesthetically pleasing, concealing any underlying irregularities.
Thirdly, the design flexibility of a floating deck is considerable. It can be easily adapted to various shapes and sizes, allowing for a customized outdoor space that perfectly complements the existing patio and surrounding landscape. Furthermore, different decking materials and patterns can be used to create a unique and visually appealing design. It is also easier to modify or even remove the deck later if needs change.
Finally, maintenance is simplified due to the deck's elevated structure. Air circulation beneath the deck helps to prevent moisture buildup and reduce the risk of mold and mildew growth. Cleaning and repairs are also easier to perform, as the deck boards can be accessed from both above and below.
Key Considerations for Design and Material Selection
Before embarking on the construction of a floating deck, careful consideration must be given to design and material selection. These choices will significantly impact the deck's aesthetic appeal, durability, and overall performance.
The shape and size of the deck should be carefully considered in relation to the existing concrete patio and the surrounding landscape. Consider the intended use of the deck and the number of people it will typically accommodate. Mark out the proposed dimensions with stakes and string to visualize the final outcome. Ensure the layout is practical and allows for comfortable movement and sufficient space for furniture.
Material selection is another crucial aspect of the design process. Several options are available, each with its own set of advantages and disadvantages. Pressure-treated lumber is a cost-effective option that offers good resistance to rot and insect infestation. However, it requires regular staining or sealing to maintain its appearance and longevity. Composite decking is a more expensive but low-maintenance alternative. It is made from a blend of wood fibers and recycled plastic, making it resistant to fading, staining, and scratching. Hardwood decking, such as redwood or cedar, offers a natural and aesthetically pleasing look. However, it requires regular maintenance to prevent weathering and rot.
The choice of decking material will also influence the substructure design. Pressure-treated lumber is commonly used for the supporting frame, but alternative materials, such as composite lumber or steel, can also be considered for added durability and longevity. The spacing of the support joists will depend on the thickness and strength of the decking material.
Adequate drainage is essential to prevent water from accumulating beneath the deck. This can be achieved by ensuring a slight slope away from the house and by providing adequate spacing between the deck boards. Consider incorporating drainage channels or gravel beds to direct water away from the deck and patio area. Proper drainage will help to prevent moisture damage and extend the life of the deck.
Finally, consider the aesthetic integration of the deck with the surrounding environment. Choose decking materials and colors that complement the existing patio, landscaping, and architectural style of the house. Consider incorporating features such as built-in seating, planters, or lighting to enhance the overall ambiance of the outdoor space.
Step-by-Step Construction Guide
The construction of a floating deck over a concrete patio, while simpler than a traditional deck, still requires careful planning and execution. The following step-by-step guide provides a general overview of the construction process.
Step 1: Prepare the Concrete Patio. Begin by thoroughly cleaning the existing concrete patio. Remove any dirt, debris, or stains. Repair any cracks or minor imperfections in the concrete surface. Ensure the patio is level and provides adequate drainage. If the patio is uneven, consider using self-leveling concrete to create a smooth and level surface.
Step 2: Plan the Layout and Mark the Dimensions. Using the design plan, accurately mark the dimensions of the deck on the concrete patio. Use stakes and string to outline the perimeter of the deck. Ensure the markings are accurate and align with the design specifications. Double-check all measurements before proceeding to the next step.
Step 3: Build the Substructure. The substructure provides the foundation for the decking boards. Construct a frame using pressure-treated lumber or other suitable materials. The size and spacing of the joists will depend on the chosen decking material and the expected load. Ensure the frame is level and properly supported. Use adjustable deck supports or shims to compensate for any unevenness in the concrete patio. Secure the frame using concrete anchors or other appropriate fasteners.
Step 4: Install the Decking Boards. Once the substructure is complete, begin installing the decking boards. Start by placing the first board flush with the edge of the frame. Use screws or hidden fasteners to secure the board to the joists. Maintain consistent spacing between the boards to allow for drainage and expansion. Use spacers to ensure uniform gaps. Continue installing the boards, working your way across the frame. Cut the boards to length as needed to fit the perimeter of the deck.
Step 5: Add Finishing Touches. After installing all of the decking boards, add any finishing touches, such as trim, railings, or steps. Install trim around the perimeter of the deck to conceal the edges of the frame. Add railings for safety and aesthetics. If the deck is elevated, construct stairs to provide access from the patio or yard. Apply a sealant or stain to protect the decking material and enhance its appearance.
Step 6: Inspect and Adjust. Thoroughly inspect the finished deck to ensure it is level, stable, and safe. Check for any loose boards or fasteners. Make any necessary adjustments to ensure the deck meets all safety requirements. Clean the deck and remove any construction debris.
Following these steps, with careful attention to detail, will ensure a sturdy and aesthetically pleasing floating deck that enhances the outdoor living space for years to come.
Maintenance of a floating deck over concrete requires regular attention to ensure its longevity and aesthetic appeal. This includes periodic cleaning, inspection, and repairs. Regular cleaning will remove dirt, debris, and algae, preventing buildup that can lead to damage and discoloration. Inspect the deck for loose boards, damaged areas, or signs of rot or insect infestation. Address any issues promptly to prevent further damage. Re-stain or seal the deck every few years to protect it from the elements and maintain its appearance. By following these maintenance procedures, homeowners can ensure their floating deck remains a beautiful and functional outdoor space for years to come.
```
3 Deck Tips Over Concrete Trex

Deck And Cover View Along The Way Concrete Patio Over Building A Floating

Pin On Patio Yard

Build A Floating Deck Over Concrete

Diy Turning A Cement Porch Into Wood Deck Catz In The Kitchen

3 Deck Tips Over Concrete Trex

Building A Deck Over Concrete With Tuffblocks Buildtuff

Building A Floating Decking On Concrete Slab Ultra

Decking Over Concrete Deck Patio Wood

Building A Deck Over Concrete Made Simple Brite Decking