How To Put In Patio Blocks
Patio blocks are a great way to add beauty and value to your home. They are durable, easy to maintain, and can be installed in a variety of patterns. If you are thinking about installing patio blocks, here are a few things you need to know.
1. Choose the right type of patio blocks
There are many different types of patio blocks available, so it is important to choose the right ones for your needs. Consider the following factors when making your choice:
- Material: Patio blocks can be made from a variety of materials, including concrete, brick, and pavers. Concrete blocks are the most durable and affordable, but they can be difficult to install. Brick blocks are more expensive than concrete blocks, but they are easier to install and can give your patio a more traditional look. Pavers are a good choice for patios that will be subjected to a lot of traffic.
- Size: Patio blocks come in a variety of sizes. The size you choose will depend on the size of your patio and the look you want to achieve. Smaller blocks are easier to install, but they can create a more cluttered look. Larger blocks are more difficult to install, but they can create a more elegant look.
- Shape: Patio blocks come in a variety of shapes, including square, rectangular, and circular. The shape you choose will depend on the look you want to achieve. Square and rectangular blocks are the most common, but circular blocks can add a unique touch to your patio.
- Color: Patio blocks come in a variety of colors. The color you choose will depend on your personal preferences and the overall design of your home.
2. Prepare the ground
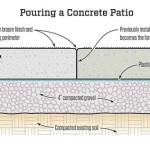
Once you have chosen the right patio blocks, you need to prepare the ground. This involves removing any existing vegetation and leveling the ground. You may also need to add a layer of gravel or sand to create a stable base for the patio blocks.
3. Install the patio blocks
Once the ground is prepared, you can begin installing the patio blocks. Start by laying out the blocks in a dry run to make sure they fit together properly. Once you are satisfied with the layout, you can begin setting the blocks in place. Use a level to make sure each block is level and straight.
4. Fill the joints
Once the patio blocks are in place, you need to fill the joints between the blocks. This will help to keep the blocks in place and prevent weeds from growing. You can fill the joints with sand, gravel, or mortar. If you are using sand or gravel, be sure to wet it down to help it settle.
5. Seal the patio
Once the joints are filled, you can seal the patio. This will help to protect the blocks from the elements and make them easier to clean. You can use a variety of sealers, so be sure to choose one that is appropriate for the type of patio blocks you have installed.
6. Enjoy your new patio
Once the patio is sealed, you can enjoy your new outdoor space. Patio blocks are a great way to add beauty and value to your home, and they can be enjoyed for years to come.

How To Lay Patio Pavers

How To Prep Lay A Base For Pavers Western Interlock
Dammann S Garden Company Diy Series How To Install Level Pavers And Patio Stones

Build A Brick Patio Start To Finish

How To Build A Paver Patio Young House Love

How To Install Pavers 15 Steps With Pictures Wikihow

Easiest Patio Pavers You Ll Ever Install

How To Install Pavers Over A Concrete Patio Family Handyman

Diy Paver Patio And Firepit Life On Shady Lane
Dammann S Garden Company Diy Series How To Install Level Pavers And Patio Stones


