How To Build Paver Patio
A paver patio is a great way to add beauty and functionality to your outdoor space. Pavers are available in a variety of materials, colors, and shapes, so you can create a patio that is unique to your home. They are also durable and easy to maintain, making them a great choice for busy families.
Building a paver patio is a project that can be completed in a weekend, but it does require some planning and preparation. Here are the steps on how to build a paver patio:
1. Plan Your Patio
The first step is to plan the size and shape of your patio. You will also need to decide where you want to place it in your yard. Once you have a plan, you can start preparing the site.
2. Prepare the Site
The next step is to prepare the site for your patio. This involves clearing the area of any grass, weeds, or debris. You will also need to level the ground and compact it. A good way to prepare the site is to excavate 6-8 inches of soil and fill it with crushed gravel. A properly prepared base is essential for a stable and long-lasting patio area.
3. Install the Pavers
Once the site is prepared, you can start installing the pavers. Start by laying out the pavers in a dry run to make sure they fit together properly. Once you are satisfied with the layout, you can start setting the pavers in place. Use a rubber mallet to tap the pavers into place and a level to make sure they are level. In choosing the right paver design and layout, define the style of your patio whether it is contemporary, classic, or rustic. You can create a variety of patterns, such as herringbone, basketweave, or running bond. To achieve an even surface, make sure the pavers are uniformly level by using a string line as a guide throughout the process.
4. Fill the Joints
Once the pavers are in place, you need to fill the joints between them. You can use polymeric sand or mortar for this purpose. Polymeric sand is a dry sand that is mixed with water and then poured into the joints. Mortar is a mixture of sand, cement, and water that is applied to the joints with a trowel. Polymeric sand is easier to use, but mortar is more durable. When adding the polymeric sand, ensure that it completely fills the gaps between the pavers. Sweep any excess sand or mortar from the surface and use a hose with a nozzle to rinse the surface and activate the polymers within the sand.
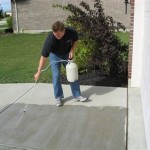
5. Seal the Patio (Optional)
Once the joints are filled, you can seal the patio to protect it from the elements. Sealing is recommended for patios that are exposed to a lot of traffic or weather. There are a variety of sealers available, so be sure to choose one that is appropriate for the type of pavers you have. Apply the sealer according to the manufacturer's instructions.
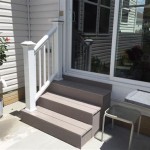
6. Enjoy Your New Patio
Your paver patio is now complete and you can start enjoying it. Paver patios are a great place to relax, entertain guests, or simply enjoy the outdoors. With proper care and maintenance, your paver patio will last for many years to come. To keep your patio looking its best, consider power washing it every few years to remove dirt and debris.

How To Build A Paver Patio Budget Dumpster

Diy Patio With Grass Between Pavers And A Fire Pit

Diy Paver Patio For Normal People

Diy Paver Patio For Normal People

Diy Pea Gravel Patio With Pavers Love Renovations

How To Build A Diy Patio For Under 120 Outdoor Spaces

How To Build A Paver Patio Bob Vila

How To Build A Patio In Weekend Finegardening

Budget Friendly Diy Paver Block Patio Interior Frugalista

How To Build A Paver Patio It S Done Young House Love